Introduction
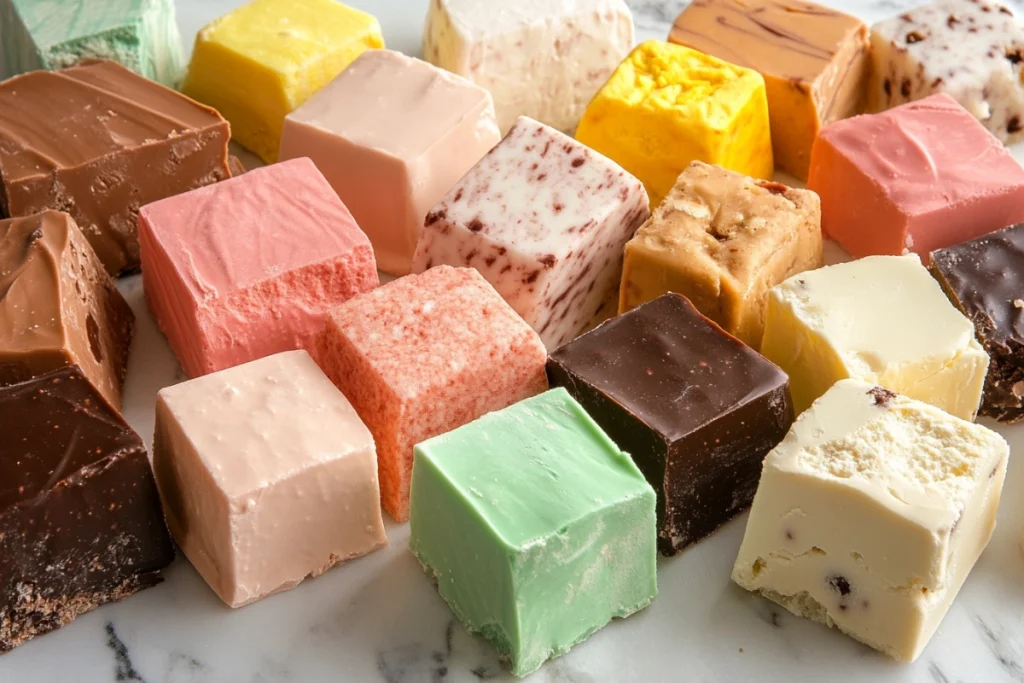
Fudge is a timeless treat enjoyed by many. While some modern recipes use shortcuts like condensed milk, the traditional fudge recipe sticks to the classic methods that have been passed down for generations. This recipe, known for its creamy texture and rich flavor, relies on a simple combination of ingredients like butter, sugar, and milk, cooked carefully to achieve the perfect consistency. In this article, we’ll walk through the history of fudge, its essential ingredients, step-by-step instructions, common variations, and troubleshooting tips to ensure your fudge turns out just right.
1. The Sweet History of Fudge Recipe
The Sweet History of Fudge Recipe
Fudge, believe it or not, was created by accident! It was a happy mistake that became a beloved treat. According to legend, a confectioner in the late 19th century was trying to make caramel but “fudged” the recipe, resulting in this new, softer confection. That’s where the name fudge comes from!
Over the years, fudge became an American favorite, especially in the early 20th century. With its rich and buttery flavor, it soon found its way into homes, festivals, and celebrations. It became particularly popular at coastal towns, where tourists would buy fresh fudge as a sweet souvenir.
Today, fudge recipes vary widely, with endless flavors and textures. But there’s something special about the traditional recipe. It sticks to the basics — just a few ingredients and a lot of love — making it the perfect starting point for anyone wanting to try homemade fudge.

2. Essential Ingredients for Traditional Fudge Recipe
Making traditional fudge from scratch requires just a few simple ingredients, but each one plays a crucial role in creating that perfect creamy texture and rich flavor. Let’s break down the key components:
Sugar
The base of any fudge recipe, sugar, is the primary sweetener that gives fudge its characteristic sweetness. In traditional fudge recipes, granulated sugar is most commonly used. It’s important to cook the sugar properly to ensure it dissolves fully, which helps achieve that smooth, non-grainy texture we all love.
Butter
Butter not only adds richness and flavor, but it also contributes to the creamy consistency of the fudge. It helps bind the ingredients and provides that melt-in-your-mouth quality. When making fudge, use real unsalted butter to maintain the purity of flavor.
Milk or Cream
Traditional fudge recipes often call for whole milk or heavy cream. These dairy products add moisture and fat, which are essential for achieving the right consistency. The fat in the milk also works with the butter to create that signature smoothness. Some variations may even use evaporated milk, but for a truly traditional approach, stick to whole milk or cream.
Vanilla Extract
A touch of vanilla extract elevates the flavor of fudge, balancing out the sweetness and adding a subtle complexity. While vanilla isn’t always included in every fudge recipe, it’s a popular addition that rounds out the taste.
Optional Add-ins
For those who want to jazz up their traditional fudge, there’s plenty of room for creativity. Chopped nuts like walnuts or pecans can add a delightful crunch, while chocolate chips or cocoa powder are great for chocolate fudge variations. But if you’re sticking strictly to tradition, you can omit these extras.

3. Step-by-Step Guide to Making Traditional Fudge Recipe
Now that we know the essential ingredients, it’s time to walk through the process of creating that classic fudge we all crave. While the recipe may look simple, precision is key to avoid grainy textures or overcooked fudge.
Step 1 – Preparing Your Ingredients
Before you start cooking, make sure you have all your ingredients measured and ready to go. Precision is important when making fudge, as slight variations in ingredients can affect the outcome. You’ll need:
- 2 cups of sugar
- ½ cup of butter
- ¾ cup of whole milk
- 1 teaspoon of vanilla extract
- Optional: nuts or other add-ins
Step 2 – Heating the Mixture
In a heavy saucepan, combine the sugar, milk, and butter. Stir the mixture constantly over medium heat until the sugar dissolves and the butter melts completely. Bring the mixture to a rolling boil, which means it’s bubbling vigorously. Be sure to continue stirring so nothing sticks to the bottom and burns.
Step 3 – Reaching the Right Temperature
One of the most critical steps in making fudge is ensuring that the mixture reaches the soft-ball stage (about 235°F or 112°C). You can check this using a candy thermometer or by dropping a small amount of the mixture into cold water. If it forms a soft, malleable ball, your fudge is ready to move on to the next step.
Step 4 – Cooling and Beating
Once the fudge reaches the soft-ball stage, remove it from heat and allow it to cool to around 110°F (43°C). This cooling period is important because it helps the fudge develop a smooth texture. Once cooled, beat the mixture with a wooden spoon until it thickens and loses its gloss. This step takes some arm strength but is essential for achieving a creamy texture.
Step 5 – Pouring and Setting the Fudge
After beating the fudge to the right consistency, quickly pour it into a greased or lined baking dish. Spread it evenly, and if you’re adding any nuts or other extras, now is the time to press them gently into the surface. Allow the fudge to set at room temperature before cutting into squares.
3. Troubleshooting Common Fudge Recipe-Making Issues
Fudge can be tricky to master, and even seasoned cooks encounter a few bumps in the road. However, with a bit of knowledge, you can fix most issues and prevent them in the future.
Grainy Fudge
Grainy texture is one of the most common problems when making fudge. This happens when the sugar crystals don’t dissolve completely or when the mixture is disturbed during the cooking process. To avoid this:
- Ensure the sugar has fully dissolved before bringing the mixture to a boil.
- Avoid stirring once the mixture has started boiling, as this can cause sugar crystals to form.
If your fudge has already turned grainy, there’s still hope! You can try reheating the mixture and bringing it back to the soft-ball stage.
Fudge Too Soft
Sometimes fudge doesn’t set properly and remains too soft. This usually happens if the mixture didn’t reach the correct temperature during cooking. To prevent soft fudge:
- Use a candy thermometer to ensure you reach the soft-ball stage (around 235°F or 112°C).
If your fudge is already too soft, you can try placing it in the refrigerator to help it set. If that doesn’t work, reheating and re-cooking might be necessary.
Fudge Won’t Harden
On the flip side, fudge that won’t harden often means the mixture was not cooked long enough or didn’t reach the proper temperature. Check your candy thermometer carefully next time, and be sure to let the fudge cool at the correct pace.
For fudge that’s already made and too soft, adding more powdered sugar to the mixture might help it solidify.
Overcooked Fudge
If your fudge turns out too hard or crumbly, it might be overcooked. This happens if the temperature exceeds the soft-ball stage or the mixture is left on the heat too long. To avoid this:
- Be vigilant with your thermometer and remove the fudge from the heat as soon as it hits 235°F.
To rescue overcooked fudge, you can add a bit of warm milk or cream and stir gently to rehydrate it.

5. FAQs on Traditional Fudge Recipe
Fudge-making often comes with plenty of questions, especially for beginners. Let’s address some of the most commonly asked questions to help you navigate your way through the process.
Why is my Fudge Recipe grainy?
Grainy fudge is usually caused by undissolved sugar crystals. To avoid this, ensure that you stir the sugar thoroughly until it dissolves before the mixture starts boiling. Avoid stirring during the boil, as it encourages the formation of sugar crystals.
Can I fix overcooked fudge?
Yes, overcooked fudge can be salvaged! If it’s too hard or crumbly, reheat it gently and add a small amount of warm milk or cream. Stir until the mixture softens and achieves a smoother texture.
How long does fudge last?
Homemade fudge typically lasts for 1 to 2 weeks when stored in an airtight container at room temperature. If stored in the refrigerator, it can last up to 3 weeks. To extend its shelf life further, you can freeze fudge for up to 3 months.
Can I use a candy thermometer alternative?
If you don’t have a candy thermometer, you can use the cold water test to determine when the mixture reaches the soft-ball stage. Drop a small spoonful of fudge mixture into cold water. If it forms a soft, pliable ball, it’s ready.
Can I make Fudge Recipe without dairy?
Yes! You can make dairy-free fudge by using alternatives like coconut milk, almond milk, or plant-based butter. The process remains largely the same, though the flavor and texture may differ slightly from traditional fudge.
Conclusion: Wrapping Up Your Traditional Fudge Recipe Journey
Making traditional fudge is a rewarding process that requires patience, attention to detail, and, of course, a sweet tooth. From understanding the key ingredients to mastering the soft-ball stage, you’ve now got the inside scoop on how to create that perfect, creamy texture. Whether you stick with the classic recipe or explore fun variations like peanut butter fudge or marshmallow fudge, you’ll soon discover that fudge-making can be as fun as it is delicious. Remember, practice makes perfect, and each batch brings you closer to mastering the art of traditional fudge!

